Discord Developer Application
This application interacts with the Discord API (opens in a new tab) and therefor requires you to create a Discord Developer Application. What you need to know about this side of Discord, is that you have both Applications and bots. What we will be focusing on here is the bot, the Application is mostly used for user authorization on websites using OAuth2 (opens in a new tab), but it's still a requirement for our bot user.
Go to Discord Developer Portal
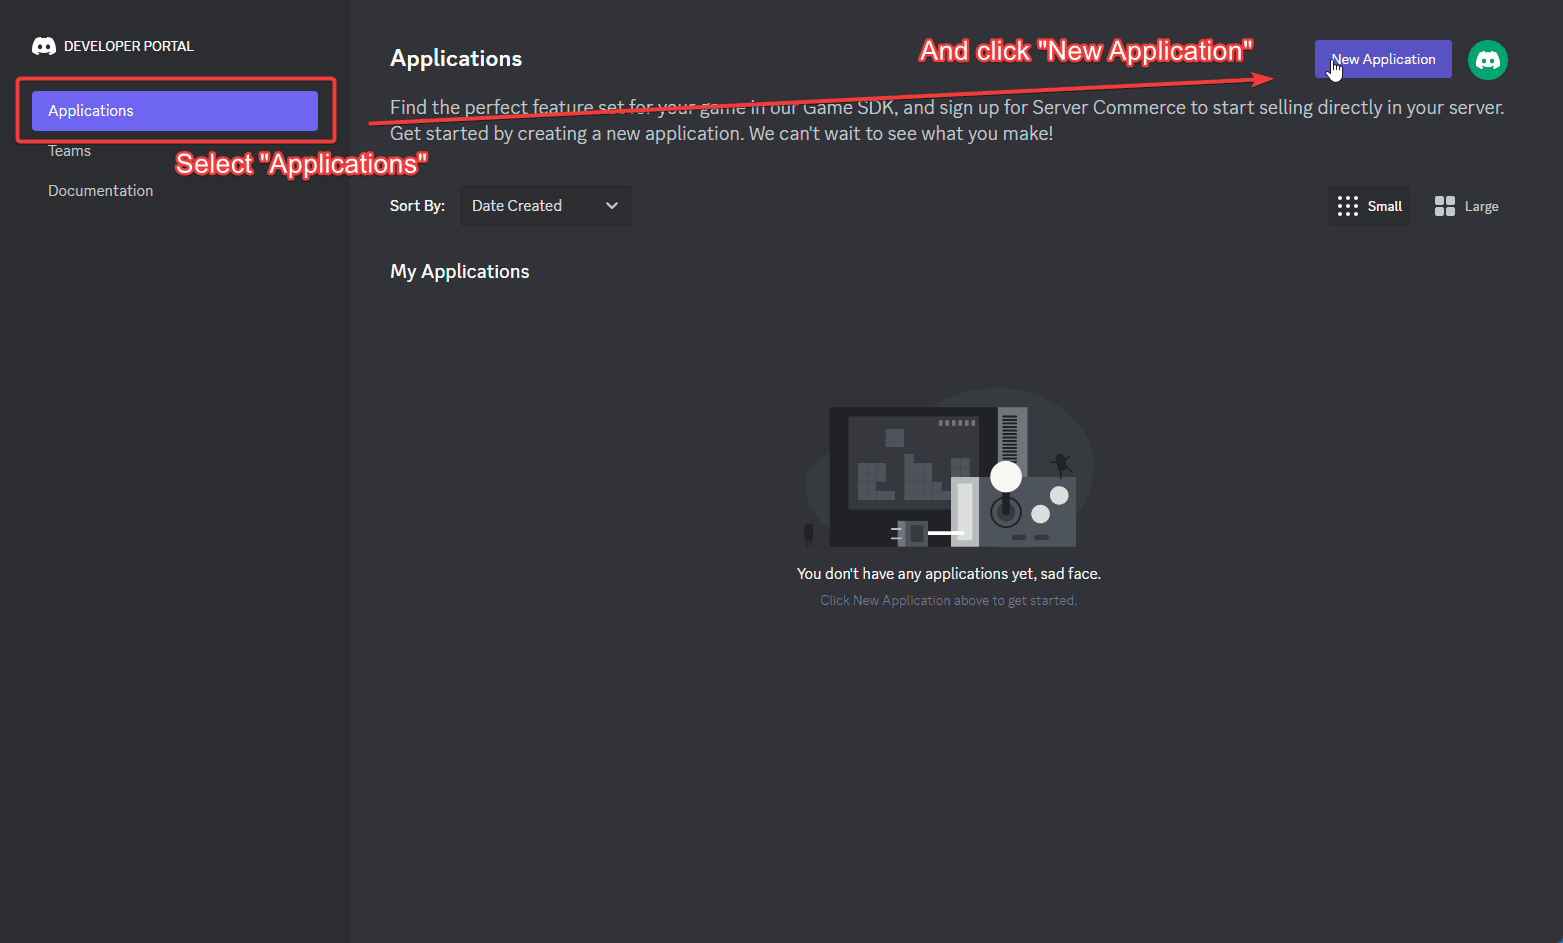
Let's get started by creating the new application by navigating to the Discord Developer Portal (opens in a new tab), and clicking the New Application button in the top right (Located in the Applications left-hand menu)
Create the application
In the modal/prompt that shows up, provide your application with a cool name, and click the checkbox to agree to the Discord Developer Terms of Service (opens in a new tab) and Developer Policy (opens in a new tab)
Discord in the bot or Application name - this is a reserved keyword for Discord staff and will error if present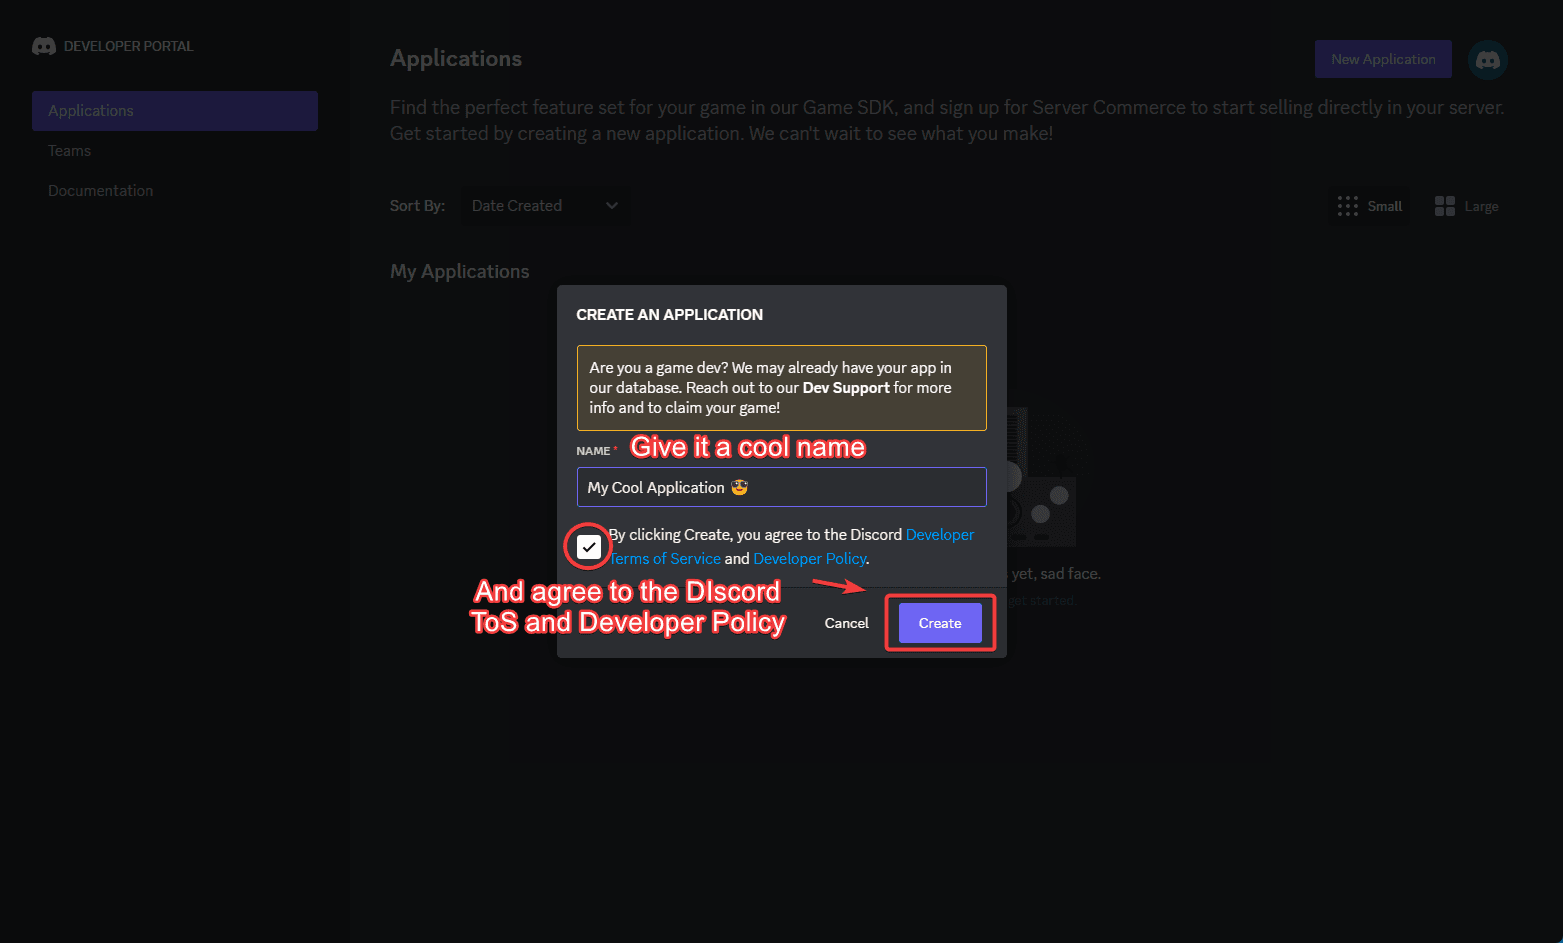
Customize your application (optional)
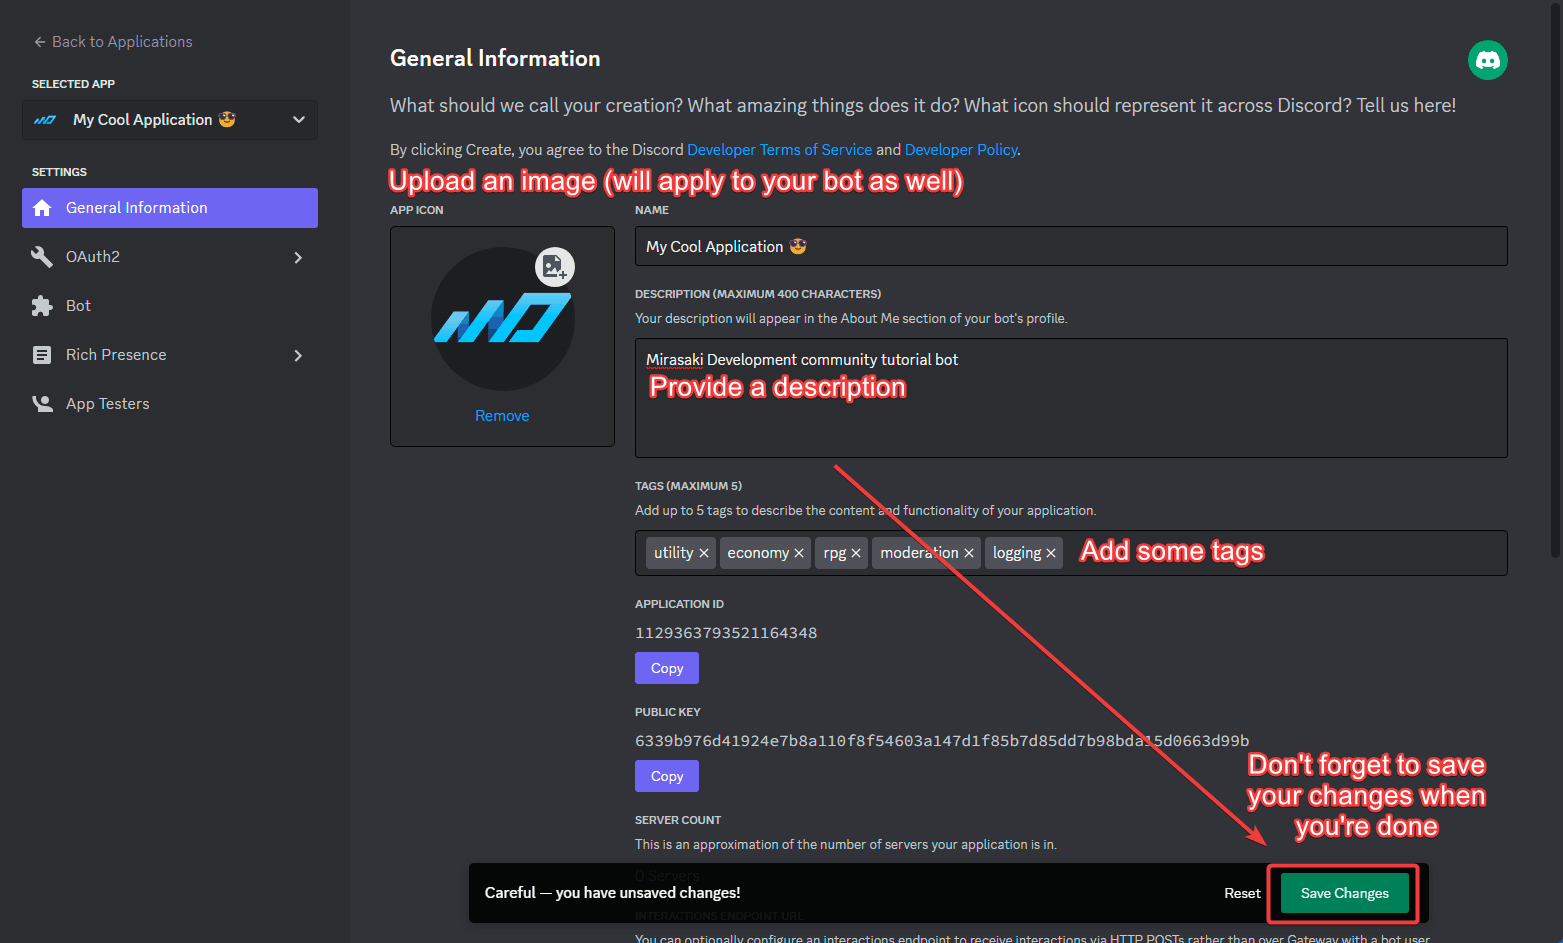
Optionally provide your application with a cool image, description, and some tags for App Directory (opens in a new tab) later on
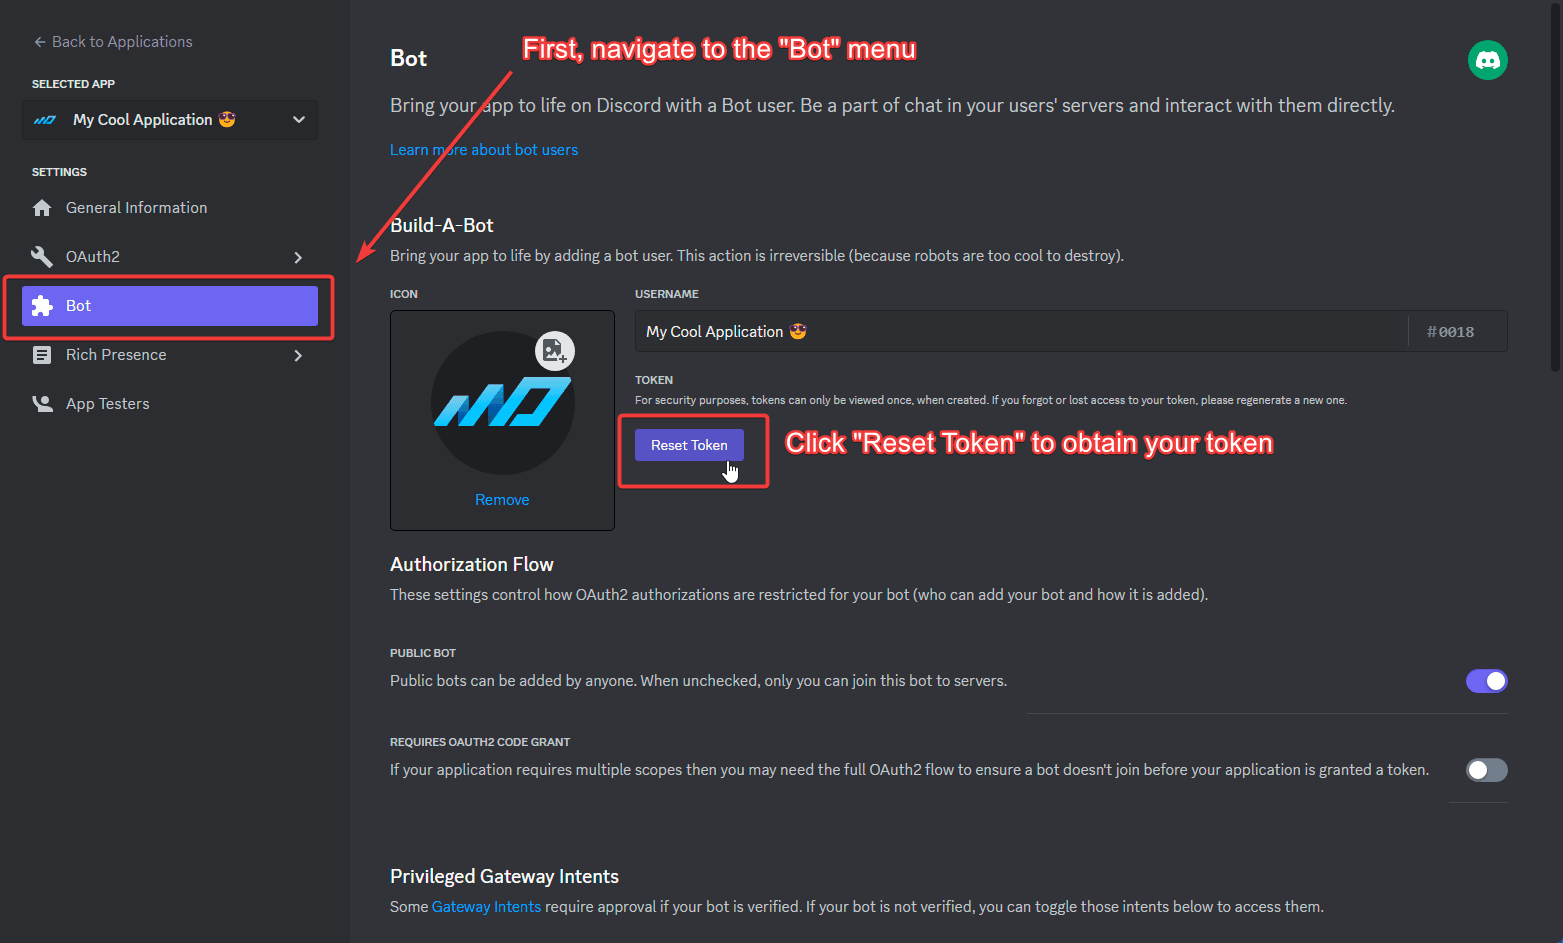
Obtaining your token
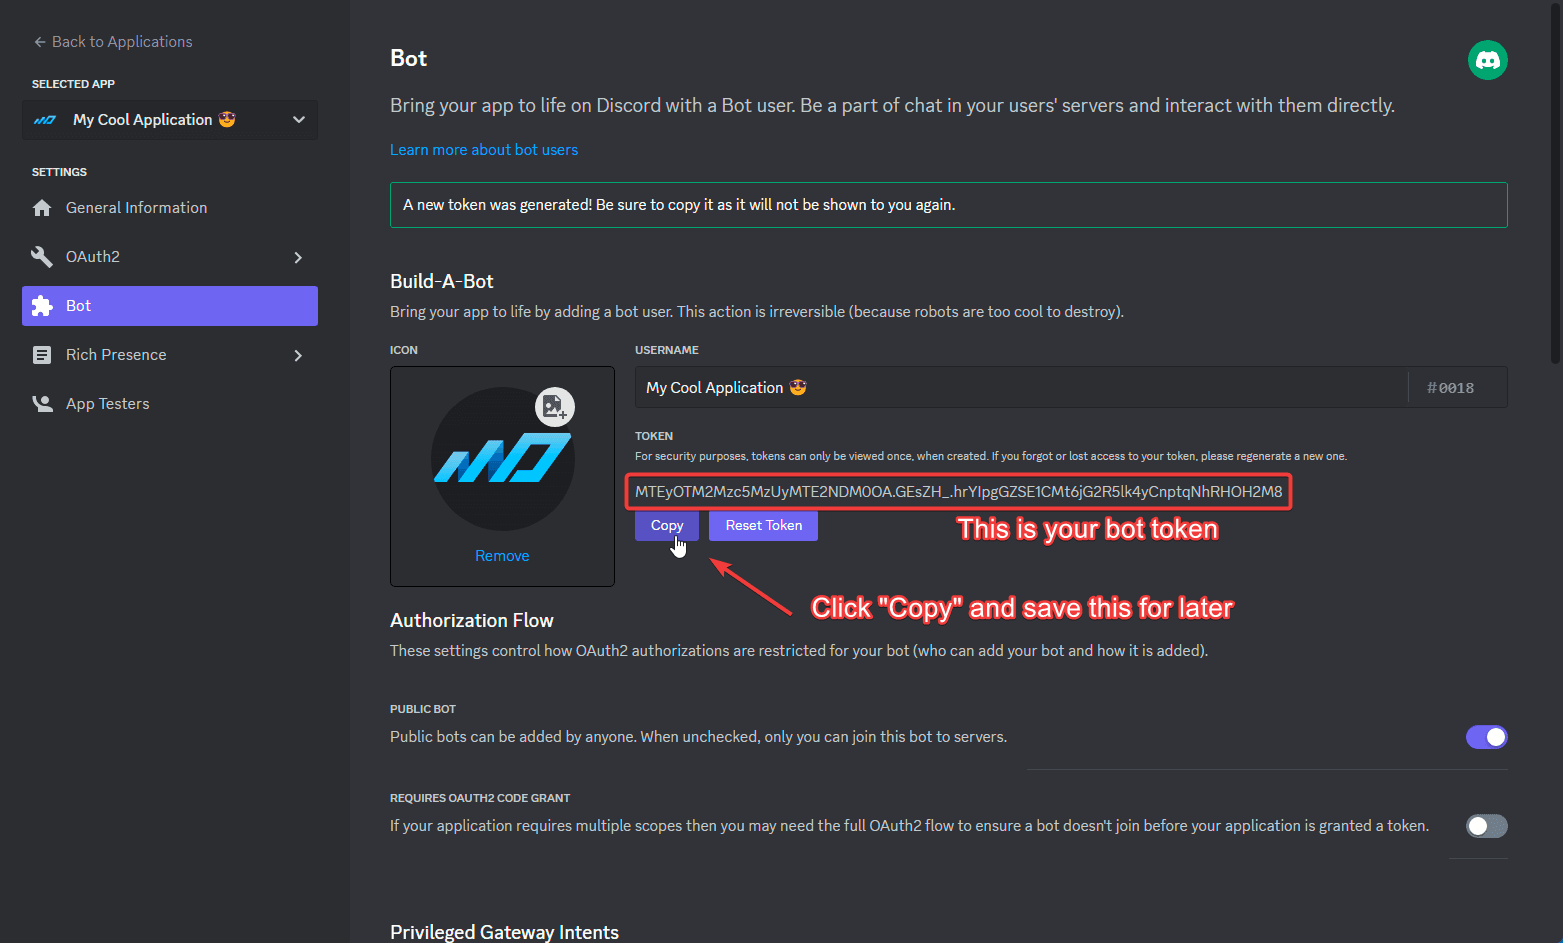
To obtain your token (otherwise referred to as Discord Bot Token), navigate to Bot in the left-hand menu, and click Reset Token - this will invalidate/expire all other tokens - meaning you can only view this secret once, so keep it somewhere safe
Token
Token is your DISCORD_BOT_TOKEN
Intents
This is also where you enable Privileged Gateway Intents for your bot, like Presence Intent, Server Members Intent, and Message Content Intent
If you're setting up the CFTools Discord bot you will need to check the Message Content intent as this is required for multiple modules the bot offers
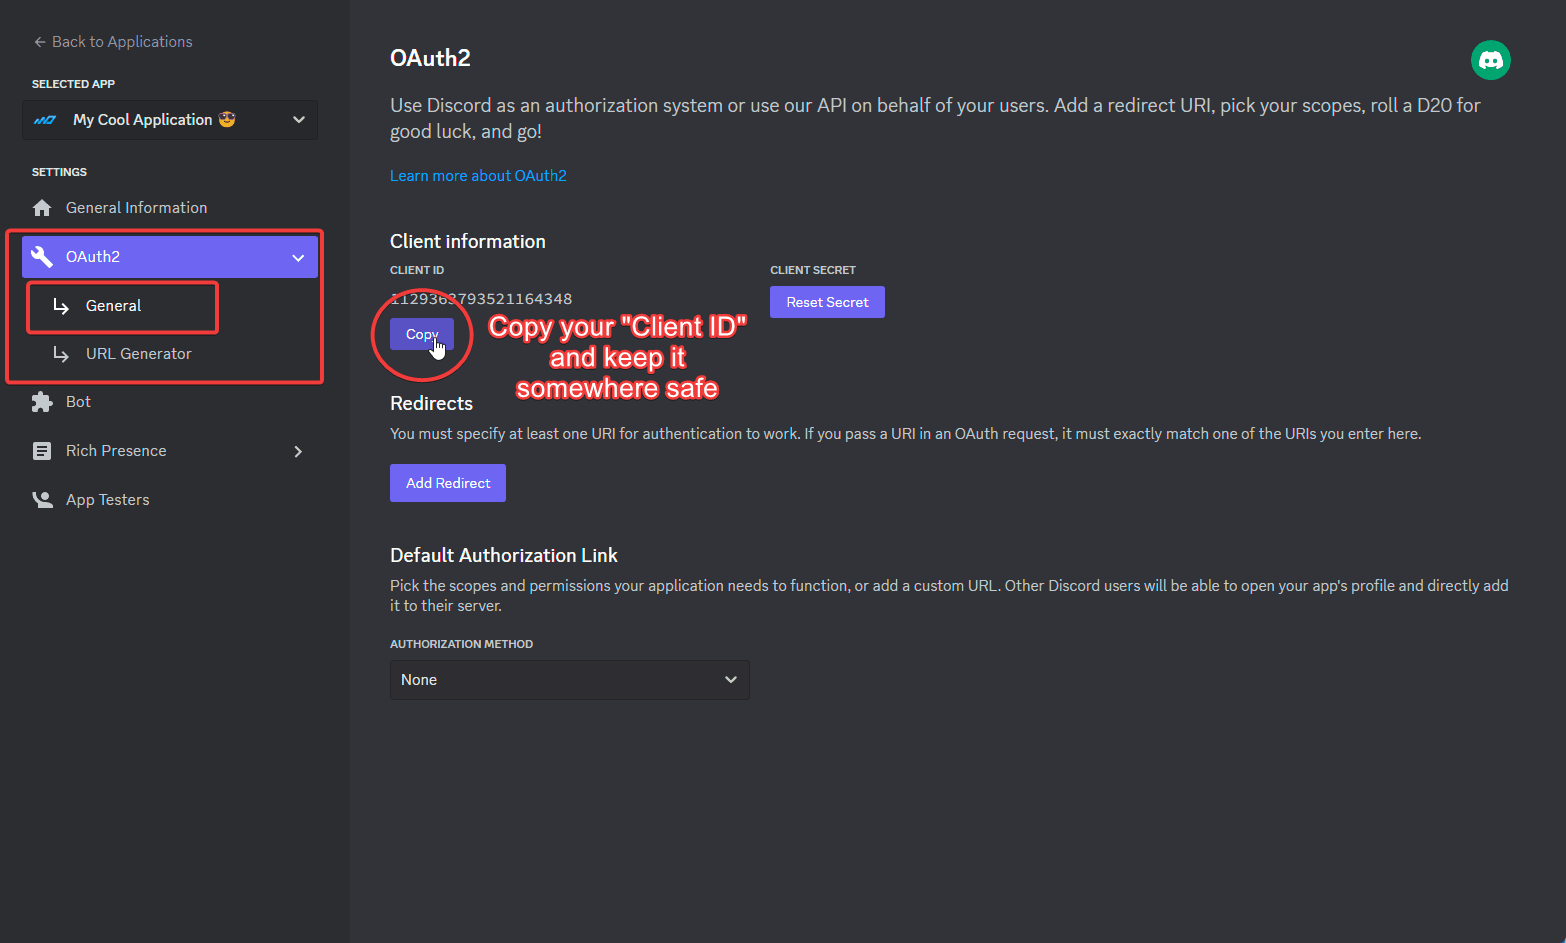
Add the bot to your server
Lets navigate to OAuth2 in the left-hand menu, and click General in the menu that was expanded.
YOUR_CLIENT_ID with your actual Client ID in the following URL and open it in a new tab: https://discord.com/api/oauth2/authorize?client_id=YOUR_CLIENT_ID&permissions=0&scope=bot%20applications.commandsClient ID
Client ID is your CLIENT_ID - this is also referred to as Discord Bot ID and Application ID
Copy your Client ID, and keep it somewhere safe - you will need this later
URL Generator
Next up, navigate to URL Generator in the same expanded menu (in the OAuth2 left-hand menu)
- Click the
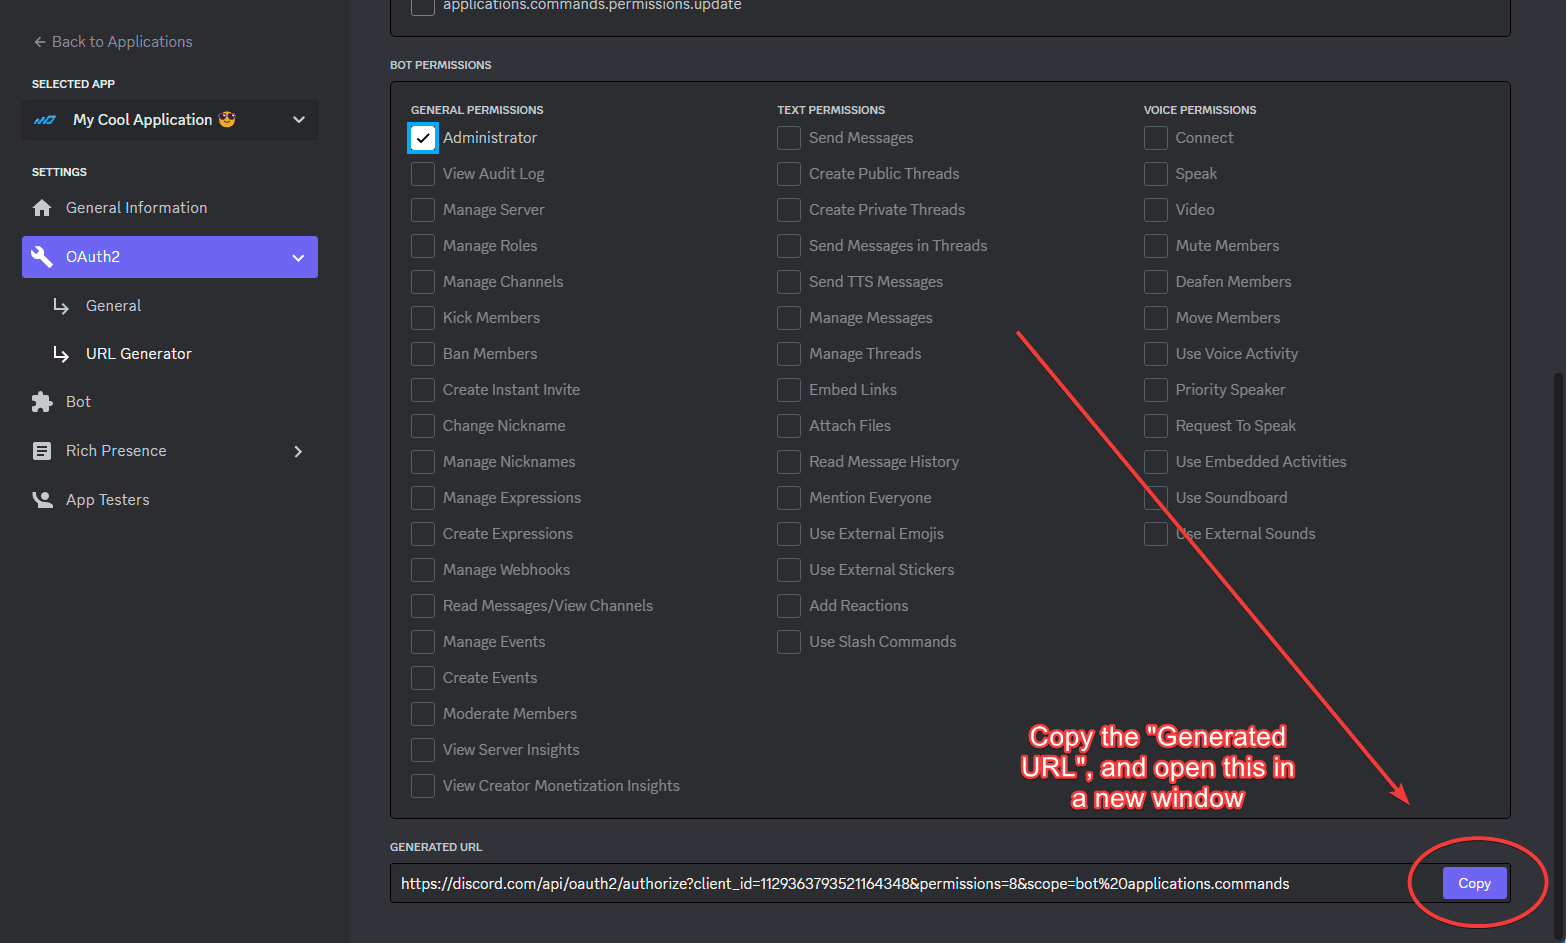
botandapplications.commandsscopes - Click the relevant permissions for your bot, or select
Administatorif you're not sure
Administrator permission to bots you own, or bots you otherwise trust. Bots with Administrator are essentially able to wipe your entire Discord server - channel, roles, members, everything - so be careful
Generated URL
Scroll down (stay on the same page), and copy the Generated URL at the bottom of your screen. Open this in a new window.
Authorize
In this new screen, follow the page's instruction to add the bot to your Discord server: